• Skip to primary navigation
  • Skip to main content
  • Skip to primary sidebar
  • Skip to footer

DisplayMonk

Solution to your problem

  • Home
    • Privacy Policy
  • About Us
  • Repair Tips
  • Schematics Bios
  • Course
  • Online Jobs
  • Tools
  • Enquiry / Contact
Home » laptop motherboard repair guide

laptop motherboard repair guide

How To Fix Bios ME Region Problem In Laptop – DisplayMonk

May 9, 2022 by displaymonk

Laptop Bios ME Region

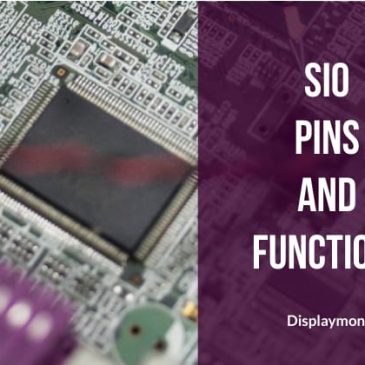
BIOS Pins Descriptions

Below is the description for BIOS pins:

Symbol Description
CS# Chip select.
SI/SIO0 Serial Data Input (for 1 * I/)) / Serial Data Input and Output (for Dual Output mode).
S0/SIO1 Serial Data Output (for 1 * I/O)/ Serial Data Output (for Dual output Mode).
SCLK Clock Input.
WP# Write protection.
HOLD# Hold, to pause the device without deselecting the device.
VCC +3.3 volt power supply.
GND Ground

What is Me Region

ME (short form of Management Engine or Manageability Engine) is a drive stored in BIOS and only on recent Intel platforms (Core i). Secondly, ME is used by first integrated into the Network Card and then transferred to Chipset (GMCH, then PCH, and MCH).

ME is stored in the source BIOS however it works completely independent of the main CPU. Lastly, it works even when the machine is in hibernation or shutdown mode but still plugged in.

How Does ME Region Work With PCH

When booting the computer, ME Region will receive all information from PCH to compare with ME Region information stored in the BIOS. So even if you save this BIOS for other computers even with the same model, PCH within also been replaced, there are still chances that errors arising from ME Region.

The reason is that the information from the new PCH does not match ME Region stored in the BIOS. Thus, ME Region is not faulty but ME Region is not working or not working well because the information does not match when PCH is replaced with a new chip or from another main unit. There are also some cases where the ME Region.

The Faults Arises When ME Region is Faulty Or Inactive

Fault 1.  When you turn on the laptop on the first attempt, the laptop will turn on but the display will not come. At the same time turn your laptop off by pressing the power button. Try the second attempt and turn your laptop on, it will show the display now.

Fault 2. dIn the second situation, you will try several attempts to turn your laptop on, but it will not show any display. In the meantime, it shows out the display at any try and your laptop along with Windows starts running perfectly. But, when you shut it down and start again, it creates the same problem of not showing the display.

Fault 3. Sometimes the laptop fan run at full speed and PCH heats up, whether the display comes or not but your laptop will turn off within 15 sec to 5 min.

Fault 4. When you press the power button, the display comes after 20-60 seconds.

Fault 5. In some cases, CPU temperature is always set at 100%

Fault 6. One of the faults is if that laptop runs for 30 seconds, 30 minutes,s or 1 hour and sometimes automatically shut down or restarts.

Fault 7. Sometimes there is a Windows OS loading problem.

Easy Intel Clean Me Region software Download

Below are steps to fix ME region problems. But before it kindly removes the BIOS from the motherboard and read BIOS with help of the BIOS programmer. Save BIOS as ‘old.bin’.

1st step: Download intel ME/ txe injector.

2nd step: Then, download the database (Intel ME firmware).

3rd step: Run intel ME/txe injector. It will ask first time to locate a folder where you save (intel me firmware). After you locate the folder, it will take 2 to 15 seconds to load (intel me firmware). Then lastly it will show the menu.

4th step: Just click (open bios) and select your old.bin desired bios.

5th step: Click on the (save new bios) button, and the software will clean ME Region Bios.

That’s all, your problem will be resolved. This is how to clear ME region in the laptop. You can troubleshoot more things from the laptop.

Conclusion

It’s important to note that modifying or repairing a laptop’s motherboard can be a complex task that requires a high level of expertise and knowledge. Attempting to repair a laptop motherboard without the necessary experience or training could lead to further damage to the device.

Additionally, it’s important to ensure that any software used for repairing a laptop’s motherboard is obtained from a reputable source and used in accordance with the manufacturer’s instructions and guidelines.

SPI BIOS works on 3 volt at its VCC pin number 8. Nowadays new BIOS works on 1.8 volt.You can program it using a BIOS programmer.

If you need assistance with repairing a laptop’s motherboard, it may be best to seek the assistance of a qualified professional or contact the manufacturer of your device for guidance.

Filed Under: laptop desktop chip level repair help guide Tagged With: how to clean me region firmware 6th generation, How To Clear Me Region, intel easy clean me download, intel me region download, laptop motherboard repair guide, me region countries, me region country, me region related problems, me region world, what does it mean when they ask for region, what does regions mean, what is a region near me, what is clean me region, what is mea region, what is mena region, what is whem region, what region is call me by your name on netflix, what region is closest to me, what region is mea, what region is noli me tangere, what religion is best for me, what steam download region is closest to me

SIO Pins And Functions

May 4, 2022 by displaymonk

sio pins and functions


Firstly, before going to see SIO pins and their functions we will know what exactly is SIO. We will see it in this laptop motherboard repair guide.

SIO stands for Super Input Output Controller. SIO is sometimes called KBC or EC also. The Super I/O chip is managed in the motherboard it controls. also, it manages most of the I/O functions on the motherboard. Normally SIO has 128 pins.

Some Features Of SIO

Below are some features of sio

  • Control power and all switches
  • It manages fan and temperature
  • Manages keyword and mouse


Some Of The Common Manufacturers Of SIO

Below are some of the common manufacturers of SIO

  • ITE
  • SMSC
  • NUVOTEN
  • WINBOND
  • ENE


Signals To Run SIO

SIO requires four things to work. Below are signals to run SIO

Signal Work
VCC Gives the power to work 3.3 volt
EC_RTC EC RST means reset to SIO 3 volt
CLOCK 32.7 khz frequency from the main crystal
BIOS Bios input to execute commands


SIO Pins And Their Functions

Below are SIO pins and their functions


SIGNAL NAME TYPE DEFINITION
FRAME PCH to SIO frame signal from PCH indicating data processing
CLK 33mhz PCH to SIO 33mhz clock signal INPUT. It means the clock department is ok.
PLTRST PCH to SIO platform reset 3 volt saying all power ok reset generated.
BIOS_RD SIO to BIOS SIO reads BIOS
BIOS_CS SIO to BIOS SIO selects BIOS
BIOS_CLK SIO to BIOS clock signal
BIOS_WR SIO to BIOS write signal to bios
ACIN VIN to SIO adapter present signal
AC_PRESENT SIO to PCH adapter present signal to PCH
S5_ON SIO to Always always voltage turn on
SUSPON SIO to SUSPEND release always voltage to suspend
MAINON SIO to Step 2 turn on 1.5 volt, 1.05 volt
RUNON SIO to Step 2 turn on 1.5 volt, 1.05 volt
VR_ON SIO to VRM turn on CPU core voltage
SPS_PWROK PWM to SIO suspend voltage ok
HWPG PWM to SIO power ok to SIO without CPU
ECPWROK (PM_PWROK)SIO to PCH SIO to PCH  all power ok
TEMP_BAT BAT to SIO battery temperature
XCLK CLOCK 32.7 khz 32.7 khz input
RSMRST SIO to PCH resume and reset signal 3 volt
ECON SIO to PWM turn on 3.3 volt and 5 volt
PCH PWR ON SIO to MOSFET turn on PCH power
LAN_PWR SIO to LAN section turn on network
NBSWON (KBC_PWRBTN) PWR BTN to SIO power button 3 volt to zero
DNBSWON (PM_PWRBTN) SIO to PCH power on signal to PCH
SUSB (SLP_S3) PCH to SIO turn on power
SUSC (SLP_S4) PCH to SIO turn on power
USBPW_ON SIO to USB turn on USB
TPCLK SIO to TouchPad touchpad
TPDATA SIO to touchpad touchpad
MUTE SIO to Audio mute audio
FANSIG FAN to SIO fan rpm input to SIO
VFAN SIO to Fan turn on fan
PROHOT CPU to SIO CPU hot signal
SMBUS CLK SM BUS CLOCK system management signal
SMBUS DATA SM BUS DATA system management signal
KS SIGNAL KEYBOARD keyboard
ECRST reset signal to SIO
WIFI_ENABLE SIO to WIFI turn on the wifi card
LID_CLOSE LID SWITCH TO SIO LID SWITCH (magnetic sensor)
IMVP_PWRGD CORE TO SIO VRM CPU core voltage ok power good


Below Mention SIO Are Programmable

In the newer generation motherboard, EC BIOS merge into SIO means if SIO is bad then we have to replace SIO and copy EC BIOS into SIO. This SIO is called programmable SIO.

Below are some examples of programmable SIO’s:

  • ite it8585e programmable
  • ite it8586e programmable
  • ite it8985e programmable
  • ite it8587e programmable
  • ite it8522 programmable
  • ite it8587e programmable
  • ite it8589 programmable
  • ite it8522 programmable
  • ite it8380e programmable 192kb
  • ite it8586vg programmable
  • ite it8995e-128 programmable
  • ite it8886e programmable
  • ite it8386 programmable
  • ene kb9012 programmable
  • ene kb9016 programmable
  • ene kb9018 programmable
  • ene kb9022 programmable
  • ene kb9028qc programmable
  • ene kb9010 programmable
  • ene kb3930qf/b1 programmable
  • nuvoton npce288na0dx programmable
  • nuvoton npce388na0dx programmable
  • SMSC MEC 1609 programmable


In this way, you can do laptop motherboard repair using SIO diagnosing.


Thank you for your visit!!!!

Filed Under: laptop desktop chip level repair help guide Tagged With: Laptop Motherboard Repair, laptop motherboard repair guide, SIO Pins And Their Functions

DDR RAM Test Point

May 4, 2022 by displaymonk

RAM test point

There are various types of DDR RAM available. The main difference is power and the second is speed. Each DDR RAM requires three levels of voltage VDD for RAM chips, VTT called reference voltage is always half to VDD voltage and last SPD voltage. There is one small chip in very every RAM called SPD chip which stores DDR capacity, speed, and other information time is called BIOS to RAM.


DDR RAM Test Voltages

Below are testing voltages for DDR RAMs

DDR1 Test Voltage
DDR1 produces 2.5 volt as VDD. Secondly, its VTT will be 1.25 volt. Lastly, its SPD is always 3.3 volt.

DDR2 Test Voltage
DDR2 produces 1.8 volt as VDD. Secondly, its VTT will be 0.9 volt. Lastly, its SPD is always 3.3 volt.

DDR3 Test Voltage
DDR3 produces 1.5 volt as VDD. Secondly, its VTT will be 0.75 volt. Lastly, its SPD is always 3.3 volt.

DDR3L Test Voltage
DDR3L produces 1.35 volt as VDD. Secondly, its VTT will be 0.65 volt. Lastly, its SPD is always 3.3 volt.

DDR4 Test Voltage
DDR1 produces 1.2 volt as VDD. Secondly, its VTT will be 0.6 volt. Lastly, its SPD is always 3.3 volt.


DDR RAM Test Points


DDR3 has below test points:
Signal Pin Number
VREF 1
CLOCK 101, 102, 103, 104
CS 114
SM DATA, CLOCK 200, 202
DRAM_RST 30
WRITE 113
DDR4 has below test points:
Signal Pin Number
VDD = 1.2 volt 33, 75, 111, 129, 135, 159, 163, 12, 54, 72, 96
VTT = 0.6 volt 258
SPD = 3.3 volt 255
VPP = 2.5 volt 257, 259
DRAMRST 108
SMBUS 254, 253

It is very important to know RAM voltages in laptop repairing. By judging RAM voltages on test points, we conclude that the RAM section is working properly or getting blocked by something.

After the RAM section, we go to the repair of the VRM section in the laptop repairing sequence. You can see a laptop repairing career consists of finding out and troubleshooting these sections.

You can also look at DDR memory comparison and have an overview of DDR RAMS.


Thank you for your visit !!!!

Filed Under: laptop desktop chip level repair help guide Tagged With: DDR RAM Test Point, laptop motherboard repair guide, laptop motherboard reparing

Solve Short Circuit Problem

May 1, 2022 by displaymonk

Solve Short Circuit Problem


When we connect the adapter to the laptop motherboard current flow via two MOSFET and current sensing resister from the battery charging section and is then given to a different buck converter. Sometimes any ceramic capacitor, MOSFET, or chip gets short to the group and adapter voltage gets loaded such a problem is called a short circuit. We will see how to solve short circuit problem.

We have to use DC regulated power supply to solve this problem. Keep something 18 volts then connect DC power supply and observe which components getting very hot and then replace that component. Do keep one thing in mind that keep the black probe connected to the ground.

Then connect red prob to Current Sensing Resister in respective laptop schematic.


DC Power Supply To Solve Short Circuit Problem

30 volt 5 amp DC power supply is very important to repair laptop motherboard. Some common use are as follows:

Uses

  1. we can use it as a universal Adapter
  2. we can use it to remove short circuits in the motherboard
  3. Another important use of the DC power supply is with help of the current meter which is on the left side we can diagnose or judge problems in the motherboard.


Current Chart For Different Motherboards Generations

Below is the current chart for different motherboards AMD and Intel generations:

CPU Core 2 duo Core i3 1st and 2nd generation Core i3 3rd and 4th generation Core 1st, 3rd, 5th, and 6th generation
Power stuck in VIN section 0.000 0.000 0.000 0.000
3.3volt generate and SIO got power 0.005 to 0.020 0.005 to 0.020 0.005 to 0.020 0.005 to 0.020
Power button press 3.3vsus, 5vsus, 1.8v, 1.05v generate 0.150 to 0.350 0.150 to 0.200 0.100 to 0.150 0.60 to 0.150
Cpu core voltage 0.600 to 0.800 0.550 to 0.700 0.450 to 0.550 0.300 to 0.350
Cpu reset and BIOS start in operation 0.800 to 1.000 0.700 to 0.850 0.550 to 0.650 0.350 to 0.450
Display started Above 1.000 Above 0.800 Above 0.650 Above 0.350


For troubleshooting problems in the laptop motherboard short circuit, you must have knowledge about laptop motherboards.


Thank you for your visit!

Filed Under: laptop desktop chip level repair help guide Tagged With: laptop motherboard repair guide, Solve Short Circuit Problem

3v 5v ALW and LDO Section

April 30, 2022 by displaymonk

3v 5v ALW and LDO - Displaymonk

In the below , we are going to see in detail 3v 5v ALW and LDO Section

Typical 3v 5v Always Voltage Section

This is the second section in the laptop motherboard called 3 volts and 5 volt section. This section receives adapter voltage and generates 3 volt to get power to SIO. This section is also called the Always Voltage section. It has two buck converters 3.3volt and 5volt. Also, it has two linear regulators called VREG3 and VREG5. If this section fails the laptop can’t turn on.

3v 5v ALW Section Signals And Their Descriptions

The following is the list of signals and their descriptions for the laptop CPU VRM section :

SIGNAL NAME DESCRIPTION
VIN input supply to chip and MOSFET
VREG3 (LDO3) linear 3 volt output
VREG5 (LDO5) linear 5 volt output
UG And LG UG = Upper MOSFET Triggering
LG = Lower MOSFET Triggering
3ON (EN)
5ON (EN)
input to 3 volt and 5 volt enable signal
3VALW
5VALW
3.3 volt always voltage output
5 volt always voltage output
PGOOD power good confirmation signal, which means power ok.

Typical 3v 5v LDO Section

This is another type of 3 volt and 5 volt section. In this type of supply only one linear output that is 5 volt called LDO5 output and two Buck Converters for 3.3 volt and 5 volt.

3v 5v LDO Section Signals And Their Descriptions

The following is the list of signals and their descriptions for the laptop CPU VRM section :

SIGNAL NAME DESCRIPTION
VIN input power to chip coming from adapter
LDOEN LDO enable
LDO linear 5 volt output
VCC 5 volt input to the chip
ON3
ON5
Enable signal to the chip
3.3v
5v
3.3 volt and 5 volt output
PGOOD power good signal output

Diagnosing 3 Volt And 5 Volt Always Section

Below are the steps to follow for 3v 5v section

Check 18 volt coming

Firstly check whether 18 volt coming on VIN pin or not. If it’s not coming then check why it’s not coming.

Whether VREG3 = 3 volt and VREG5 = 5 volt

Check for VREG3 is coming approximately 3 volt and VREG5 approximately 5 volt. If they are not coming it means Chip may be bad or output circuit loading.

3 volt Enable Signal Is Coming

Check whether 3 volt enable signal is coming or not. If it’s not coming then check for Chip why not getting enable 3 volt.

Check output Coils for 3.3 volt and 5 volt output

Finally, check whether 3.3 volt and 5 volt coming on the output coil or not. If it is not coming then it can mean Chip or driving MOSFETs are bad.

This is how to learn how to solve problems for 3v 5v ALW and LDO Displaymonk.

Single Chip Buck Converter

This converter is very popularly used in Next Generation motherboards. Th this chip both switching MOSFET and PWM chip combine tother. There is one Linear regulated output for 3 volt or 5 volt and one PWM regulated output.

Single Chip 3 volt Always Voltage

SIGNAL NAME DESCRIPTION
VIN input voltage to chip
LDO linear voltage output
ENABLE enable signal to PWM
OUTPUT buck output voltage
PGOOD power good signal


Single Chip 3v 5v volt Always Voltage

SIGNAL NAME DESCRIPTION
VIN input voltage to chip
LDO linear voltage output
ENABLE enable signal to PWM
OUTPUT buck output voltage
PGOOD power good signal

You can learn about different laptop repairing related guides to make a good laptop repairman career. you can also contact us at 8087435056 via WhatsApp or via email use prasadbakare@gmail.com. Expect a reply in 2-3 days.

Thank you for your visit!!!

Filed Under: laptop desktop chip level repair help guide Tagged With: 3v 5v ALW and LDO - Displaymonk, laptop motherboard repair guide

Repair Laptop VRM Section – DisplayMonk

April 28, 2022 by displaymonk

Repair Laptop VRM Section

For doing repair the laptop VRM section we firstly must know that the laptop CPU VRM section generates CPU core voltage to the CPU. When all rest of the other power is ok then only CPU CORE voltage is generated. VRM chip work on 5 Volt and it requires enable signal to work called VR ON signal.

VRM chip first checks whether the laptop CPU is present from its VSENSE pin and the temperature from the NTC pin. Secondly, if everything is fine then the VRM chip starts triggering the MOSFETs, and CPU core voltage generates 1 Volt to 1.5 Volt and approx 30 Ampere current.

When the core voltage gets stable VRM chip generates IMVP PWRGD or VRM PWRGD signal. Moreover, the meaning of this signal is that CPU CORE power is ok and running.

List Of Signals And Their Descriptions For Laptop CPU VRM Section

The following is the list of signals and their descriptions for the laptop CPU VRM section :

SIGNAL NAME DESCRIPTION
VR ON VRM Chip gets this input signal to turn on core voltage.
VCC (VDD) 5 Volt power to VRM chip
VIN Volt input to VRM buck MOSFET
VCORE CPU CORE volt approx 1 Volt CORE volt consider in current
GFX CORE Graphics core voltage
VGATE VRM PWRGD When CPU core voltage is stable VRM chip sends out this power good signal
SVID CPU communicates with the VRM chip
VR HOT When the CPU portion gets very hot then the VRM chip sends out VR HOT low signal

Steps To Repair Laptop VRM Section

Below are the steps to repair the laptop VRM section

Check CPU Core

Firstly, Check whether the CPU core voltage for VCC pin is coming or not.

Check VR ON signal

Secondly, check VR ON signal is coming or not. If it’s not coming then check all previous voltages and SIO signals. If VR ON signal coming then come to the next step.

Check 5 Volt VCC

Thirdly, Check whether 5 Volt VCC is coming or not. However, if it’s not coming then check why 5 Volt VCC is not coming.

Check Switching Mosfets In Laptop VRM Section

Fourthly, check All Switching Mosfets available for the VRM section.

Replace CPU For Checking

Finally, if everything else is not working then as a final step replace the CPU and check if the motherboard working.

You can also visit for new books for training.

Filed Under: laptop desktop chip level repair help guide Tagged With: Laptop Motherboard Repair, laptop motherboard repair guide, Repair Laptop VRM Section, teps To Repair Laptop VRM Section

  • Go to page 1
  • Go to page 2
  • Go to page 3
  • Interim pages omitted …
  • Go to page 5
  • Go to Next Page »

Primary Sidebar

Search On Website

Laptop Desktop Chip Level Help Guide

  • Windows 10 Restarts After Shutdown

    Windows 10 Restarts After Shutdown

    March 24, 2025

  • T.VST59.031 Firmware Software

    T.VST59.031 Firmware Software Download Latest

    March 18, 2025

  • Mobile and Tablet Repairing Institute Class in Ratnagiri, Maharastra

    Mobile and Tablet Repairing Institute Class in Ratnagiri, Maharastra

    December 14, 2024

  • Laptop and Computer Repairing Institute in Ratnagiri, Maharastra

    Laptop and Computer Repairing Institute Class in Ratnagiri, Maharastra

    December 14, 2024

  • pm-modi-lic-sakhi-yojana

    LIC’s Bima Sakhi Yojana 2025: How To Apply?

    December 12, 2024

Footer

Mobile Repair

We do mobile repairing.

Learn more about mobile repairing service.

Laptop Repair

We laptop repairing.

Learn more about laptop repairing service.

TV Repair

We do TV repairing.

Learn more about tv repairing service.

Copyright © 2025 · DisplayMonk

  • Home
  • About Us
  • Repair Tips
  • Schematics Bios
  • Course
  • Online Jobs
  • Tools
  • Enquiry / Contact